metalworkingmag.com
29
'18
Written on Modified on
Keyence International
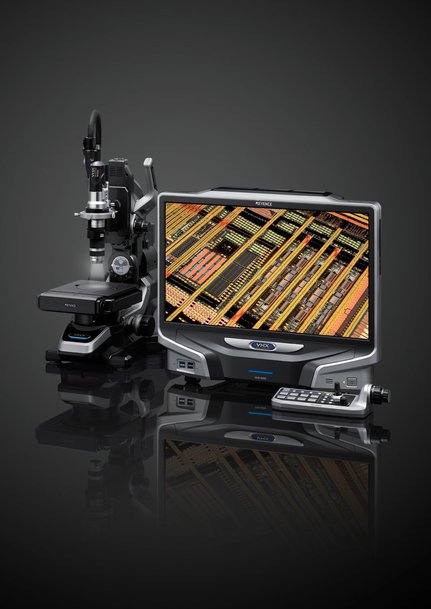
The VHX-6000 digital microscope from KEYENCE simplifies observation and analysis
With the advanced lighting performance and adjustment functions of the VHX-6000 digital microscope, KEYENCE simplifies and further improves its customers’ capacity to analyse parts.

Large depth of field
One indisputable advantage is its large depth of field, which makes the observation of small parts much easier. Thanks to the large depth of field, even samples with an irregular surface can be measured efficiently and reliably (to analyse contamination according to the ISO 16232 standard for example). In fact, the lens, camera and image processing engine are designed to provide an optimal ratio between depth of field, resolution and brightness.
Test repeatability
Changing the angle of inclination of the lens or rotating the stage has no effect on the field of vision. For the operator, this means that the target part can be observed intuitively from all angles. Furthermore, there is no need for the operator to change the position of the target, hence the high level of reproducibility.
Observation parameters such as magnification factor and lighting method can be stored with the image. The user can thus capture new images using under the same conditions as an existing image and directly create analysis reports containing the required parameters as well as the image.
For reliable 2D and 3-D measurements, the use of different parameters (colour, contrast and height) allow different users to perform measurements without having variations between them, and this is possible for any place on the image. It should also be noted that the measurement results can be stored on the image or exported in CSV format for later analysis.
Multi-angle lighting
Users know that lighting is one of the most important elements in microscopy (it determines what it is possible to observe and under which conditions). Thanks to the multi-lighting feature, the user can obtain the ideal light by pressing a single button.
What's more, the compact double zoom lens design, linked to the flexibility of the stage which can be oriented freely at any angle, makes it easier to observe the sample from all angles and at all magnification levels.
Viewing surfaces in 3-D
One of the benefits of 3-D images comes from the fact that they contain height data at every point in the target. This makes it possible to measure the actual shape of the part to be inspected. Once the 3-D image has been saved, a new measurement can be performed at any time.
KEYENCE’s know-how
Designed by KEYENCE engineers with ease-of-use, speed and measurement repeatability in mind, the VHX-6000 digital microscope series allows the user to view, capture and measure parts using a single instrument with unequalled simplicity and repeatability.

